Thinking of getting an Apple TV? Good for you! It's only $99 and you deserve it. My family and I have enjoyed using ours for years, and if the wife and kids had to choose, they'd probably ditch me before giving up the easy access to HBO GO, Netflix, and Disney Junior. (I don't take it personally.) Setting up an Apple TV is dead easy, but I've whipped up this quick guide to make sure you get the most out of your little black box. Come meet the new star of your living room!
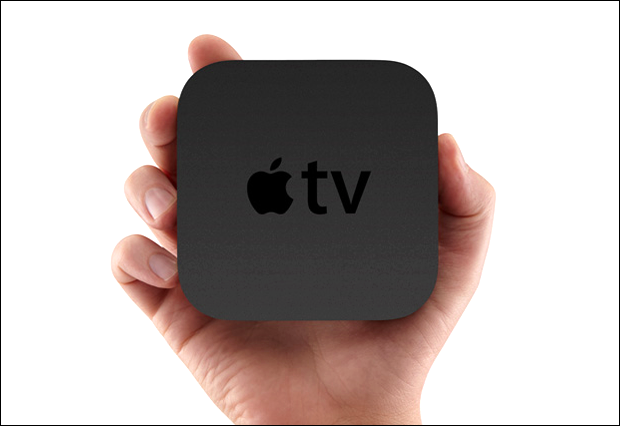
Say hello to your little friend.
APPLE TV IS a small (3.9"x3.9”), square box that uses an Internet connection to stream movies, music, and more to your TV. Content is accessed through a variety of channels that populate the Apple TV home screen like apps. As I said above, the device retails for $99, and can often be found cheaper depending on the deals Apple has going. Refurbished units sometimes pop up at Apple.com for $75, and past specials have paired new units with $25 iTunes cards. There have been a few revisions to the hardware over the years, so if you buy used, be sure to get a third-generation unit (which first hit the market on March 7, 2012), otherwise it won't be capable of displaying video at full 1080p HD.
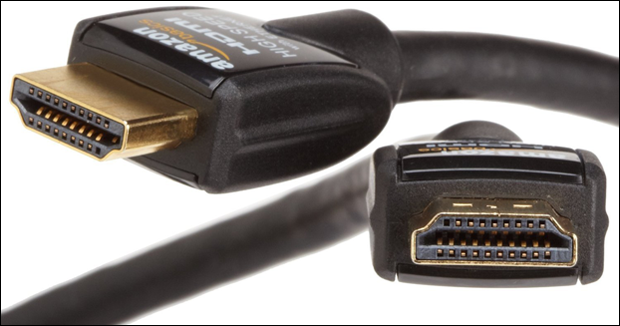
Retail chains sometimes charge ridiculous prices for HDMI cables, so if you can't find a fair deal, order online from sites such as Amazon or Monoprice.
TO MAKE APPLE TV WORK, you need to connect it to the Internet. A wired Ethernet connection is generally more stable, but Wi-Fi works just fine as long as the Apple TV is getting a strong signal from your wireless router (you can check signal strength on the Apple TV at Settings > General > About). To connect the unit to your TV, you need a standard HDMI cable (sold separately for about $3-$7, depending on the length). If you want to hook up surround sound, you can use an Optical audio cable.
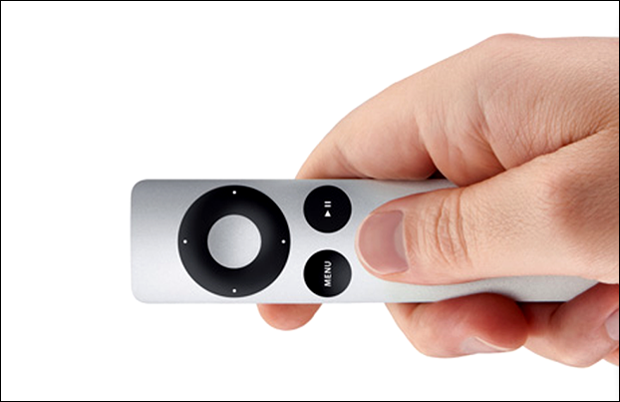
The included Apple TV remote looks slick, but it's made for the tiny hands of Keebler Elves.
APPLE TV COMES WITH a remote that's super simple to use, but is kind of flimsy to hold — it's too thin and tiny to get a good grip on. It's not a major issue, but you might be better off using the free Remote app that lets you control Apple TV with your iPhone, iPod touch, or iPad. This is by far the best option for typing the names of movies or TV shows into, say, a Netflix search field, since it takes forever to seek out letters with the arrow keys of a regular remote. Apple TV also comes with a power cord, and that's it — as I said before, you'll need to buy an HDMI cable separately.
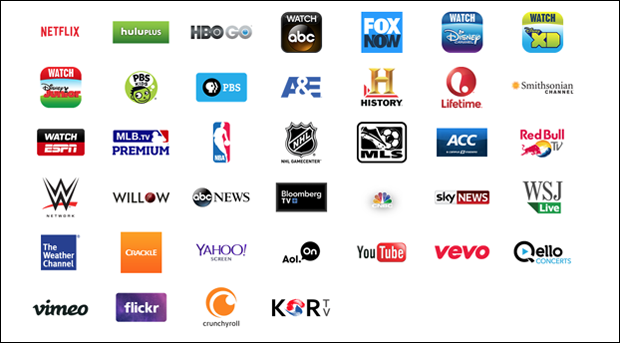
The Apple TV channel lineup grows and gets better every year. (Image taken from the official Apple TV page.)
APPLE TV CHANNELS contain a wide variety of content, everything from YouTube videos to live sports to HBO, and new ones are added every few months or so. The better ones usually require a paid subscription for access to anything more than a few sample shows, either with the content provider (such as Netflix and Hulu Plus) or a cable/dish company (such as Comcast or Direct TV). Here's a full, up-to-date list of every available Apple TV channel in the US (lineups in other regions may vary):
- A&E
- ABC News
- ACC Digital Network
- AOL On
- Apple Events
- Bloomberg TV
- CNBC
- Crackle
- Crunchyroll
- Flickr
- FOX NOW
- HBO GO (cable/dish subscription required)
- HISTORY
- Hulu Plus (subscription required)
- iMovie Theater
- iTunes Movies and TV Shows
- iTunes Music
- iTunes Radio
- KORTV
- Lifetime
- MLB.TV Premium
- MLS Live
- NBA League Pass
- Netflix (subscription required)
- NFL Now (premium content requires a paid subscription)
- NHL GameCenter
- PBS
- PBS KIDS
- Podcasts
- Qello TV
- Red Bull TV
- Settings
- Showtime Anytime
- Sky News
- Smithsonian Channel
- The Weather Channel
- Trailers
- VEVO
- Vimeo
- Wall Street Journal Live
- WATCH ABC
- WATCH Disney Channel
- WATCH Disney Junior (some free content; cable/dish subscription required for full access)
- WATCH Disney XD
- WatchESPN (cable/dish subscription required)
- Willow TV
- WWE Network (subscription required)
- Yahoo Screen
- Your Photos and Videos
- YouTube
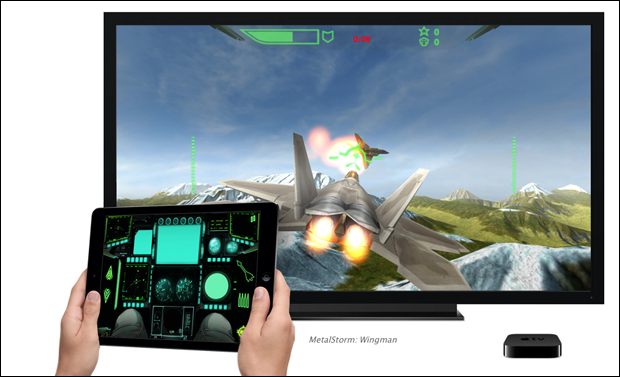
Some apps, such as MetalStorm: Wingman, go the extra mile with creative AirPlay features.
APPLE TV CAN ALSO stream stuff from your Mac or iOS device — it can even mirror exactly what's on your other screen. (Some apps don't support this feature, though.) You can buy music, movies, and TV shows through various channels, and stream any iTunes content you've bought on other devices — anything purchased using the same Apple ID. iTunes Radio is also supported, and with My Photo Stream, you can pull your latest photos and videos down from the cloud to view on your TV. With so much functionality and interoperability with the rest of Apple's ecosystem, adding an Apple TV really is a no-brainer.
Big things are on the way for Apple's little black box.
A MAJOR UPGRADE is expected to come to Apple TV sometime in 2015, either through new firmware, new hardware, or both. According to various reports, Apple has been seeking deals with content providers to create a more robust device, one that could potentially serve as a strong cable alternative. Thus far, companies are said to have been cool on an Apple plan that could bring à la carte subscriptions to channels that have traditionally been cable-only. Apple will likely find a compromise to add value to its device while stopping short of changing the status quo; some rumors claim Apple could work alongside cable providers, possibly even using Apple TV in place of traditional cable boxes. It is also said to be highly likely that a new Apple TV App Store will turn the device into a de facto game console. Time will tell, but it seems clear that Apple TV will only get better.
The Original From Mac Life
Tips: Garner the best DVD to Apple TV ripper for Windows (10) for playing DVD on Apple TV 4//3/2/1 without trouble
In our daily life, we may come across such situation:
It is easy to have the kids scratching the discs and wrecking the DVD player. I have actually purchased some of these movies twice as the kids wrecked the first version. Is there any easy way to play DVD on Apple TV without wearing down the DVD?
There is nothing eye catching as enjoying a high definition DVD on Apple TV with family and friends in the comfort of your home. The numerous features that come with Apple TV are enough attraction for individuals to play DVD on Apple TV. Apple TV offers its users with full HD 1080p output as well as AirPlay functionality. Talk about the latest technologies Apple TV does not disappoint in this area, it comes with iCloud backup of the TV, and iTunes Match, Photo Stream, among other evident technologies. However, it is well known that Apple TV supports very few file formats, which include H.264 and MPEG-4 videos meaning DVD cannot work with your Apple TV supported formats. This means people will always get a very new TV experience by playing DVD on their Apple TV. Nevertheless, if you want to become one of those who are enjoying these incredible new TV experiences, then you will have to convert your video to an Apple TV supported file. For this purpose, you will have to find a good DVD ripper or a converter.
To complete the conversion, you need a DVD converter tool. Here Aimersoft DVD Ripper is recommended to help you rip DVD to Apple TV compatible video formats with easy operation and high output quality. Furthermore, you can even extract audio files from DVD for playing on Apple TV. The Windows version is compatible with Windows 10/8/7/XP/Vista while the Mac version supports Mac OS X 10.6, 10.7, 10.8, 10.9, 10.10, 10.11 El Capitan.
- 6X fasted converting speed and 100% original quality
- Convert any DVD to Apple TV, Apple TV HD format
- Advanced video and audio format settings provided
- Embed DVD movie metadata and edit DVD videos
- Auto-Add converted DVD files to iTunes Library


Here the detailed steps to use DVD Ripper for Windows are described. The way to convert DVD video to Apple TV on Mac is the same.
Step 1. Load the DVD movies you want to play on Apple TV into the program: click Load DVD or File > Load DVD folder to choose your DVD-ROM in the pop-up window and click the OK button to import the files. As you see, you can either convert the whole DVD or just choose the chapters you want to convert.

Step 2. Since regular DVD movies usually have several subtitles like English, French, German, etc. You can click Subtitle to choose the one you need or select No Subtitle. For the audio tracks, simply click Audio Track and select the one you want. After that, click Profile and choose Apple TV as the output file format from the drop-download format list for your Apple TV. Currently the video presets for Apple TV and Apple TV HD are provided. If you want to play DVD on Apple TV 3, you can choose Apple TV HD as the output format, which is perfect for the New Apple TV.

Step 3. Finally, click the Start button to rip video from DVD for viewing on Apple TV. In a few minutes, you will get the converted movies. And then, just use iTunes to stream the files to Apple TV and enjoy them! Have a nice time!
Editor’s Recommendation:
- How to Copy DVD to iTunes Library for syncing to Apple TV, iPad/iPhone
- How to Extend Rental Time of iTunes Movie Rental?
- Multiple Ways to Add lossless FLAC files to iTunes and iPhone/iPod/iPad
- How to Download and Add DVD collection to my iPad Air (2) for watching?
- How to Copy DVD movies to your iPhone 6 plus for watching unlimitedly